Showing posts with label parsley. Show all posts

Sunday, 10 July 2011

Paella - how to make use of great seafood

It's seafood season - the mussels and clams are excellent right now and so we made use of some of them this week.


For two people you are going to need:

About half to three quarters of a pound of mixed mussels and clams (see below for preparation)
8 prawns
About two thumbs' worth of chorizo (chopped)
Some bits of cooked chicken
Onion (finely chopped)
Bell pepper - any colour you like (finely chopped)
A pinch of saffron
Olive oil and cooking oil (about a tablespoon altogether)
A couple of tomatoes (chopped)
250g (6oz) of paella rice (or any other kind except basmati really)
A good glug of white wine
Half a pint of chicken stock
Lots more water
Chopped flat-leaved parsley
Some lemon wedges for garnish

A big, heavy-based frying pan & a large pan with a lid.
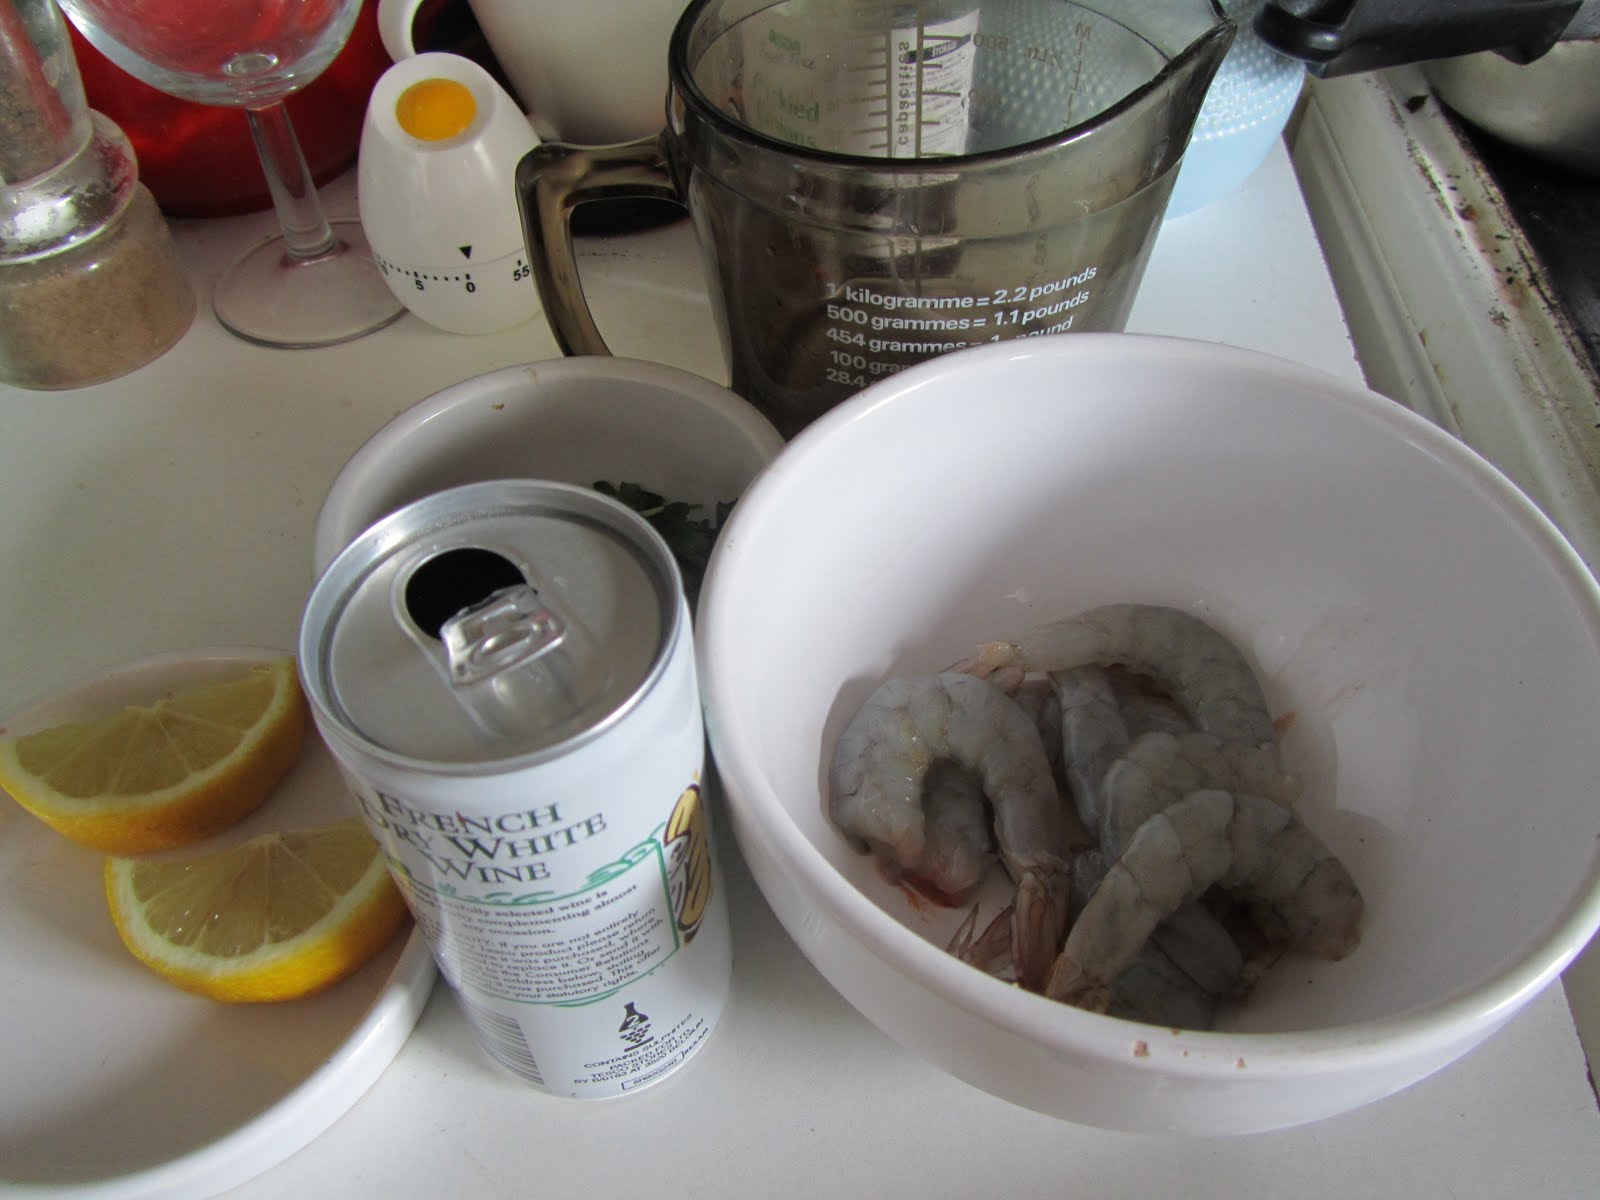
Mise en place
Start by doing all your preparation. Trust me, it'll make life easier. Chefs call it 'mise on place' but don't let that put you off.  Having everything handy makes for a better dish because you don't stress out midway.

Chop up your onions and peppers and tomatoes and parsley first. Put your lidded pan on the stove with a glug of white wine and a small amount of chopped onion and some chopped parsley and a bit of cooking oil in it.  Put the frying pan on a bigger stove-ring and add the oils.

Prepare your prawns: take the heads off and peel off the main part of the body skin and legs. You can leave the tail bit on if you want to be cheffy but it doesn't matter. DO NOT THROW AWAY THE SHELLS! See below for what to do with them.

Prepare your clams and mussels. (see below)

When you've chopped and peeled and prepared you can turn on the heat under the frying pan and add the onions and pepper and saffron and tomato. Fry gently until the onions soften. Add the rice and fry for a little longer until it starts to look translucent. At this point you can put the heat on under the other pan. Then you can add the chorizo and the chicken to the frying pan.

Two quick stirs and then add the wine. When it starts to bubble start to add thestock. Put it in a little at a time and stir it all round until it begins to absorb into the rice. Keep adding and, when you run out of stock, add water. Keep it bubbling until the rice is soft and edible. (try a single grain from time to time to check)

Meanwhile, add your prepared clams and mussels to the lidded pan and turn up the heat. About 30 seconds later give the pan a good shake and lift the lid up. The shells should be starting to open. Give it another 30 seconds and try again. Do not cook for more than 2  minutes! Take it off the heat as soon as they're open. Discard any that don't open.
Cooked mussels and clams
Add the peeled prawns and stir the mixture till they start to turn pink. If your rice isn't cooked yet you can add the mussel and clam juice.
Add the prawns

Once the rice is softened, add the cooked clams and mussels to the pan. Stir in the rest of the chopped parsley. Decorate with lemon wedges and serve immediately.

HOW TO PREPARE MUSSELS AND CLAMS
Buy live prawns and clams from your fishmonger. If you are sold them in a plastic bag, put a hole in it to ensure an oxygen supply. Keep them as cool as possible on your journey home. As soon as you get home throw them into a large bowl or bucket of water with some salt added and a teaspoon or so of flour.
When you need to prepare them, you don't need to do much to clams other than rinse them and throw out any that aren't closed. Give them a good shake. If any of them remain open when you give them a hard rap with your knuckles, throw them away. Use a sharp knife to scrape off any barnacles from the mussels. The mussels have a furry bit that sticks out from the inner curve of the shell. It's called a beard. Use your knife to pull this away.

As soon as you've scraped and beard-pulled they're ready to use.

WHAT TO DO WITH PRAWN HEADS AND SHELLS
Put any peelings and heads into a small pan with a good grinding of black pepper, a squeeze of lemon juice, a hefty glug of white wine and some water. Boil them for about 10 minutes. Let it cool and then bash the shells up with a potato masher to extract all the flavour. Strain it into a jug and let it cool completely and then freeze it for use later.

Thursday, 3 February 2011

Store cupboard 1: A taste of things to come

Auntie Anne's kitchen has a well stocked store cupboard and I don't know what I'd do without it. As long as you have a few key ingredients you can always rustle up a meal at short notice. So I thought I'd do a few posts on what I keep in my store cupboard to give you a helping hand.

Writing about my herbs made me think about what else I keep around that can help me make my cooking more interesting. As more and more of us are trying to save money we're being forced increasingly to buy less meat or go for the cheaper cuts.

Now some cheap cuts have plenty of flavour but in other cases they need help in the taste department. Consider mince. It's cheap and cheerful and extremely versatile but it can be horribly bland, especially if you go for the low fat option. Fat is where meat keeps its flavour (which is why belly pork is so yummy) but it's also really not good for you.

In our house we use a lot of turkey mince because it's very low in fat, relatively cheap and easily available. But it's pretty low on savour too! I use mince for its potential to be the base for a lot of really nice dishes. Think spaghetti bolognese, lasagne, meatballs, chilli, cottage pie. But that means having a good range of herbs and spices available to me.

As you've already read I grow my own herbs and keep pots on the shelf so they are in easy reach but I also have a good selection of dried herbs too.

So what do you need?

Well that depends entirely on what your favourite meals are. If you love curry but hate Italian you're going to need coriander but won't have much use for basil. But if you're like the majority of us and enjoy a range of different cuisines you'll want a varied selection of flavourings.

So where do you start?

Let's assume that you're setting up your kitchen from scratch and you currently have nothing in store. There's a few flavourings that you really need to buy up front. If you really are starting from scratch it can be an expensive business so you need to know what's essential and what can wait.

You will definitely need:
Salt
Don't mess around with separate table salt and cooking salt. Buy what's cheap and use it for both. You might like to buy sea salt if you feel the need for iodine but it isn't necessary for your cooking.
Pepper
Can't have one without the other really. If you can only afford one I'd suggest black peppercorns and a grinder (buy one you can refill). If you add black pepper to white sauce you'll get visible specks, of course, so have a small pot of ground white on hand as well if you can afford it.
Vinegar
If you can only afford one go for a white wine or cider one. Malt's best for chips but it isn't all that great in anything else, like sweet and sour sauce or salad dressing.
Mustard
A tin of dried mustard powder is a wonderful thing to have. It adds heat and spice to lots of foods and will perk up sad curries or chilli. Don't buy the ready made stuff in a jar. It goes off. And you can always mix a bit of your own if you fancy some on a ham sandwich - the instructions will be on the side of the tin.
Sugar
OK so you probably have this anyway if you take it in tea or coffee but you'll still need a small bag, even if you take your beverages as they come. It's handy for sweet and sour, freshening salad dressings and some people even put it on tomatoes. (Honest!)

Stage two
Got your first few items? Still got some money left? Let's go for stage two then.
Worcester Sauce
Or Yorkshire relish if you're in that part of the world. Not the thick stuff like ketchup - the thin stuff like vinegar. A dash of this will perk up the most boring of dishes and you must have seen the adverts where they throw it over all kinds of stuff like cheese on toast. A dash in tomato soup does wonders for it.
Tomato ketchup/puree
If you like tomato ketchup buy it and let it earn its keep off the table as well as on. If (like me) you're not exactly a ketchup fan, buy tubes of puree. A good squidge helps the colour of stews no end. It's also a great start for pizza.
Soy sauce
No it isn't the same as Worcester Sauce. It's distinctively Chinese and you can't do Asian food without it. Buy a low salt version if you can.

Stage three
We're getting a real start now! Onto the herbs and spices. Like I said earlier - it depends on what you like to eat. If you really love Mexican food buy chilli powder. If you really love curry buy a curry powder- how hot is up to you - and some ground coriander seed. For Italian fans buy dried oregano and basil. Chinese? Then it's five spice powder and star anise.

You can do that over the space of three weeks so it doesn't break the bank but you'll still be able to make some good tastes from day one.

Moving onwards
After that the world's your oyster. Buy as many as you can afford each week. Even if that's just a single new spice each shopping trip you'll soon see your store cupboard growing.

My suggestions? For the curry fan you'll eventually need black mustard seed, fennel seed, cumin, dried ginger, turmeric, garam masala, cardamom and fenugreek.

Just love aromatic spice? Cinammon, nutmeg (buy whole ones and a grater), allspice and cloves.

Herb fan? Parsley, bay leaves, tarragon (great with chicken) mint, marjoram, sage, rosemary, thyme.

Other great flavours? Celery salt (you can't make a Bloody Mary without it apparently) Carraway. Cayenne pepper. Paprika. Smoked paprika. Garlic powder (for real emergencies when you don't have fresh) Juniper berries. Lemon grass. Anything you particularly like.

Now's also the time to start buying extra vinegars - a good balsamic, red wine, now get your malt for your chips!

Above all - enjoy cooking with all the different flavours and make sure you experiment to find your own style!

Tuesday, 1 February 2011

Fresh herbs, dried herbs and pots on the windowsill

I'm a bit of a gardener - only a little bit - but I have potted plants in most of my rooms. The kitchen is not spared because, for one thing it's one of the few south-facing bright rooms in the house and, for another, it's the ideal place to keep fresh herbs handy.

There's a trough just outside the back door with a selection of herbs in it too, but in winter they look a little tatty and it's a lucky day if I can manage to get a few useful leaves off them.

However, I have a tiny bay tree in the kitchen and a few pots of parsley at various stages of growth and harvest. These have all come from garden centres or supermarkets, bought growing in the pots, because I'm useless at growing herbs from seed. Don't know why, but there you go.

Meanwhile, if I want to indulge in something that bit special I'm not above buying a bunch of cut herbs when I go shopping. Trouble is, unless you eat curry every day you can end up with a lot of waste coriander that doesn't keep too well.

So what do I do with the leftovers? Dry them of course! It's so easy, and much better than watching them rot on the compost heap.

How to dry herbs

Any time that you've used your oven there will be residual heat that would otherwise go to waste. If you've got fresh herbs about you can preserve them with no trouble at all.

Get a baking tray and cover it in kitchen towel. Spread out your herbs as thinly as you can over the towel.  They dry much better if they don't overlap.

Switch off your oven and place the baking try in on the bottom shelf. Close the door and leave it for several hours, preferably overnight.

Next day check that they are dry. If not, just leave them on the side for a while. (As long as your kitchen doesn't get too steamy) They'll finish drying over the next day or so. If you have a naturally steamy kitchen you might need to warm the oven up again and repeat the process. 100C should be plenty.

Then all you have to do is put them in jars and label them.

Enjoy!